Clone a Git repository with all branches
In this post, we will show we how to clone a Git repository with all branches, using different methods.
When we clone a Git repository, we create a copy of the repository on our local machine. By default, Git only clones the main branch (usually called master or main) of the repository, which contains the latest and most stable version of our project. However, sometimes we may want to clone all the branches of the repository, which may contain different features, bug fixes, or experiments.
The idea is to use the git-clone to clone the repository. This will automatically fetch all the branches and tags in the cloned repository.
Here, <repository-url> is the URL of the remote repository that we want to clone. After doing the git-clone, we can view all branches using git-branch with the --all flag:
$ git branch -a
Here’s a live example:
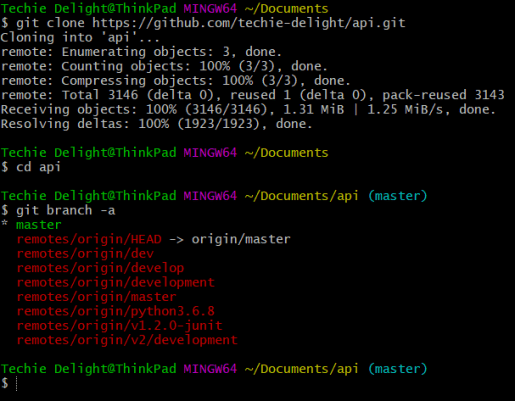
To check out the specific branch, we can use the git-checkout command to create a local tracking branch.
Alternatively, we can directly specify the branch name in the git-clone command using its -b flag. This will result in a specific branch to be checked out, which also fetches all branches present in the repository.
This is demonstrated below:
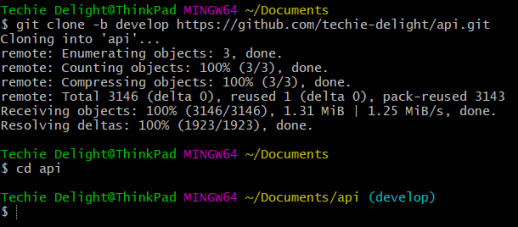
That’s all about cloning a Git repository with all branches.
Thanks for reading.
To share your code in the comments, please use our online compiler that supports C, C++, Java, Python, JavaScript, C#, PHP, and many more popular programming languages.
Like us? Refer us to your friends and support our growth. Happy coding :)